Saturday, May 31, 2014

Boxwood Leaf Miner - Monarthropalpus flavus (continued...fly stage)

In an earlier post, I captured photos of small Boxwood Leaf Miners- Monarthropalpus flavus (boring worms) that feed between boxwood leaf tissue.  In this post, I captured the worms, now emerging as pupae, transforming into adult flies.

Here, the leaf miner begins its emerging life cycle, by exiting through a hole and developing a pupae which hangs on the underside of last years leaf. Last year, adults laid eggs to overwinter in the tissue of the leaf. Eggs hatched in late April and began munching away until its time to begin the process of becoming a winged adult fly.
The leaves on the right, are last year's. On these leaves, you can see the pupae coating sheath which the adult fly shed. Once the fly cracks through this, it emerges and sits a while, until its wings have dried enough for flight.
I sat a while at the sight of all the activity. Flies buzz around, mate and then find the new flush of boxwood growth. They fixate their bottom end to the underside of the new tender leaves and poke holes - inserting their eggs for the next generation.
The flies time it perfectly. The tender new leaves have soft tissue, easy to poke their eggs into.
Interestingly, when it's windy, the flies have little success attaching their egg laying bottoms to the leaf. You can easily swat them away at this point.
I noticed this process has gone on for about two days. It's now late May, we've had brilliant sunny days and I suspect another day or two and all the egg laying will be done. Many adults were dead and left hanging up-side-down. It's a pretty short adult life span.

Best to prune the tips of growth a week or two after this process is complete. This removes the eggs and then the boxwood will respond with putting on new growth without any adults left to lay more eggs.

Neat process to witness entirely. Have a look at my previous post on Boxwood Leaf Miners - the worm stage.

Wednesday, May 21, 2014

Perennial Plants for Shade - Part 1

Outside of Hostas, folks ask me all the time what perennials grow in shade. There's a plethra of selection nowadays. Here is part 1 of my top choices for perennials that endure shade. Most of them are selections from my wee little garden. These perennials last. Unlike some which are borderline hardy, these have provided endless struggle to survive and fair beautifully.

Note: when I say shade...my backyard in peak growing season get's about 3 hours of dappled sun. Definitely more shade than sun. My choices here don't reflect plants that grown in complete shade.

Moist (yet free draining soil) Shade:

Astilbe sp. (flowers late June)
Astrantia major (Masterwort - flowers mid June)

Pulmonaria officinalis (Lungwort - flowers early May)

Dicentra spectablis (Bleeding Heart; white - flowers mid-May)

Well Drained (soil) Shade:

Japanese Painted Fern (Athyrium niponicum 'Pictum') does quite well in free draining soil.


Various Hosta fortunei (my preference are thicker leaved varieties, which have better slug resistance)
Rudbeckia sp. Indian Summer Black Eyed Susan (flowers July-September, self seeds too)
Eupatorium rugosum 'Chocolate' (bronze brown foliage in June, paling to green, flowers early September)

Ground Covers:

Hedera helix, Evergreen English Ivy (evergreen)
Lamium maculatum 'Cannon's Gold' (flowers on new growth)
Lamium maculatum 'White Nancy' (white flowers on new growth)

Much more here on Part 2....

Saturday, May 17, 2014

Photo of the Month - May

A Helleborus that I "rescued" from a big box store which had plants squished on a discount cart. Couldn't tell you the cultivar variety, since it had no tag. It had one leaf last year and this spring has sprung back to life. Beautiful rose pink blush on petal's back side. Anyone know this variety?

Friday, May 16, 2014

Fascinated Over Fasciation

Couldn't help the corny post title.

Plants never cease to amaze me, they create such interest and wonder.
Here, fasciated growth has formed on a tip of this Lilac (Syringa vulgaris) stem. You can see lateral buds trying to form, but are squeezed and hardened.
To define: Fasciation is an abnormal condition of plant tissue growth that happens on the apical meristem (tip growth) of the plant. It generally creates a flattened portion of tissue, looking like concentrated stems all fused together in a clump. I've seen it happen with flowers, fruit and sometimes the root.

Here's another unusual growth on the same shrub.
Comparison to a normal apical stem tip.
Interestingly enough, some offshoots of this sort of growth have created new cultivars - like Fasciated Willow, used widely in the floral industry.

I've seen fasciation on very few deciduous shrubs - mainly willows. Never yet seen on lilac as this one.

Cause: genetic, bacterial, viral, fungal, hormonal and of course, environmental. That's my guess in this situation. This lilac is flanked by a salted walkway and roadway in the winter. Quite exposed to prevailing winds. However, I may be wrong.

Quite fascinating.

Saturday, May 10, 2014

Over-seeding Patchy Turf With White Clover

Frustration kicks in every spring when it comes to grass lawns.
Brown grass - having died from dog urine, salt damage along walkways, grub damage, snow mould causing root fungus, crab-grass removal making bare spots....ok, repairing the lawn is getting tiresome.

What to do.
We decided to over-seed with White Clover (Trifolium repens). This brand: The General Seed Company.
Given this is the right time of year and it is going to rain in the next two days, this is how we went about it:

First, we dealt with the sad looking turf. We mowed the lawn at the lowest setting, without scalping the turf. Then we de-thatched the grass lawn by raking it thoroughly.
We raked out about 3 of these large containers full. Even removing some green blades of grass to make sure soil is exposed.
Any bare spots, we removed dead grass completely, and loosened (aerated) the soil beneath with a garden fork. The ground beneath is fairly moist, given it rained a day or two earlier. This is key. Clover seed requires adequate moisture for germination.

We purchased soil in bags. We checked local flyers for deals on bagged top soil. Pays to shop around. The bagged soil has no weed seeds. Enough said. Worth the extra expense IMO. Try not to use fluffy soil. Add sand to peat based soils.

Any bare turf pockets, we back filled with soil and raked it into the existing grass.

Leveling the ground as we raked. The bare spots had over 1-2 inches of top soil.
If you have access to a sod roller, use it. We just gently walked over the new top soil - trampling it down with foot traffic. Our bare patches didn't warrant a roller rental. It's important to tamp down the soil - it prevents soil from washing or blowing away during inclement spring weather.
We top-dressed the remaining healthy grass with soil and raked it in thoroughly. We desire to have both grass and clover to thrive.

Various Clover Seed lawn instructions mentioned that the best way to overseed clover in smaller areas is to incorporate and mix the seed with soil before applying.
Clover seed is similar looking to mustard seed. It's quite tiny and to seed directly by hand, would cause too much concentration in some spots vs others.
This bag can cover over 2000sq ft. Our area was about 900sq ft. We used half a bag worth of seed. Took a wheelbarrow, added 30L bag of top soil and mixed the seed thoroughly.
Cutting an old jug like this - to make a scoop, we over-seeded the mixture on to the bare spots first.
Sprinkling it as even as possible.

I again gently trampled the sprinkled mixture on the bare spots and then took a corn broom and swept over the areas.
Do not rake the seed in. Raking would disturb the newly placed soil beneath. Sweep instead. This is far more gentler and just as effective. The sweeping pressure makes sure the seeds stick well and go just below the soil level. For best results, White Clover seeds should not be sown deeper than 1/4 inch or 1cm beneath the soil. Mixing it with soil and spreading them together allows good coverage without over burying the seed.

Once the bare spots were over-seeded, we sprinkled the soil/seed mix rather sparingly over the grass.

To make sure the seed gets in between the grass, down to the soil level, we fan raked the turf thoroughly. Our expectation is to see clover pop up between the grass, eventually overtaking the grass once it gains vigor.

With the last bag of soil, we lightly top dressed the lawn over the seed. Being more generous with bare pockets. Just enough to cover the seed. 
Just use your fingers to flick the soil sharply and it will scatter quite evenly.
Water in gently. Don't use harsh spray or sprinklers that soak, creating puddles. A gentle shower that wets the soil is sufficient. Try planning this job around pending rain. Not stormy rain, but good lengthy rain. Clover seed needs moisture to germinate. Don't let it dry out. It takes 7-10 days for germination success.
All done.
Why White Clover? Clover is fairly deep rooted and more durable.  It's more tolerant to urine, to salt, to drought and to foot traffic. Clover spreads rapidly by creeping stolons, for good coverage. It stays green during drought laden summers. It also fixates nitrogen with Rhizobium bacteria that grows along their roots.  White Clover self seeds when allowed to flower. You'll need to mow and irrigate less often.

Note: It also attracts bees. For some this may be a deterrent, but with declining bee populations, we welcome them to our landscape.

Let's hope it works out.

Will update on progress and durability.  (Update completed)

Please look at my blog's left panel for more alternative lawn choices.

Tuesday, May 06, 2014

Plant Profile: Yucca filamentosa - Maintaining and Sustaining

I find most Yucca filamentosas are never properly taken care of. Folks don't realize that hardy yuccas require regular maintenance and a little TLC to get them to last for more than a few years. Otherwise they die out and look tired.

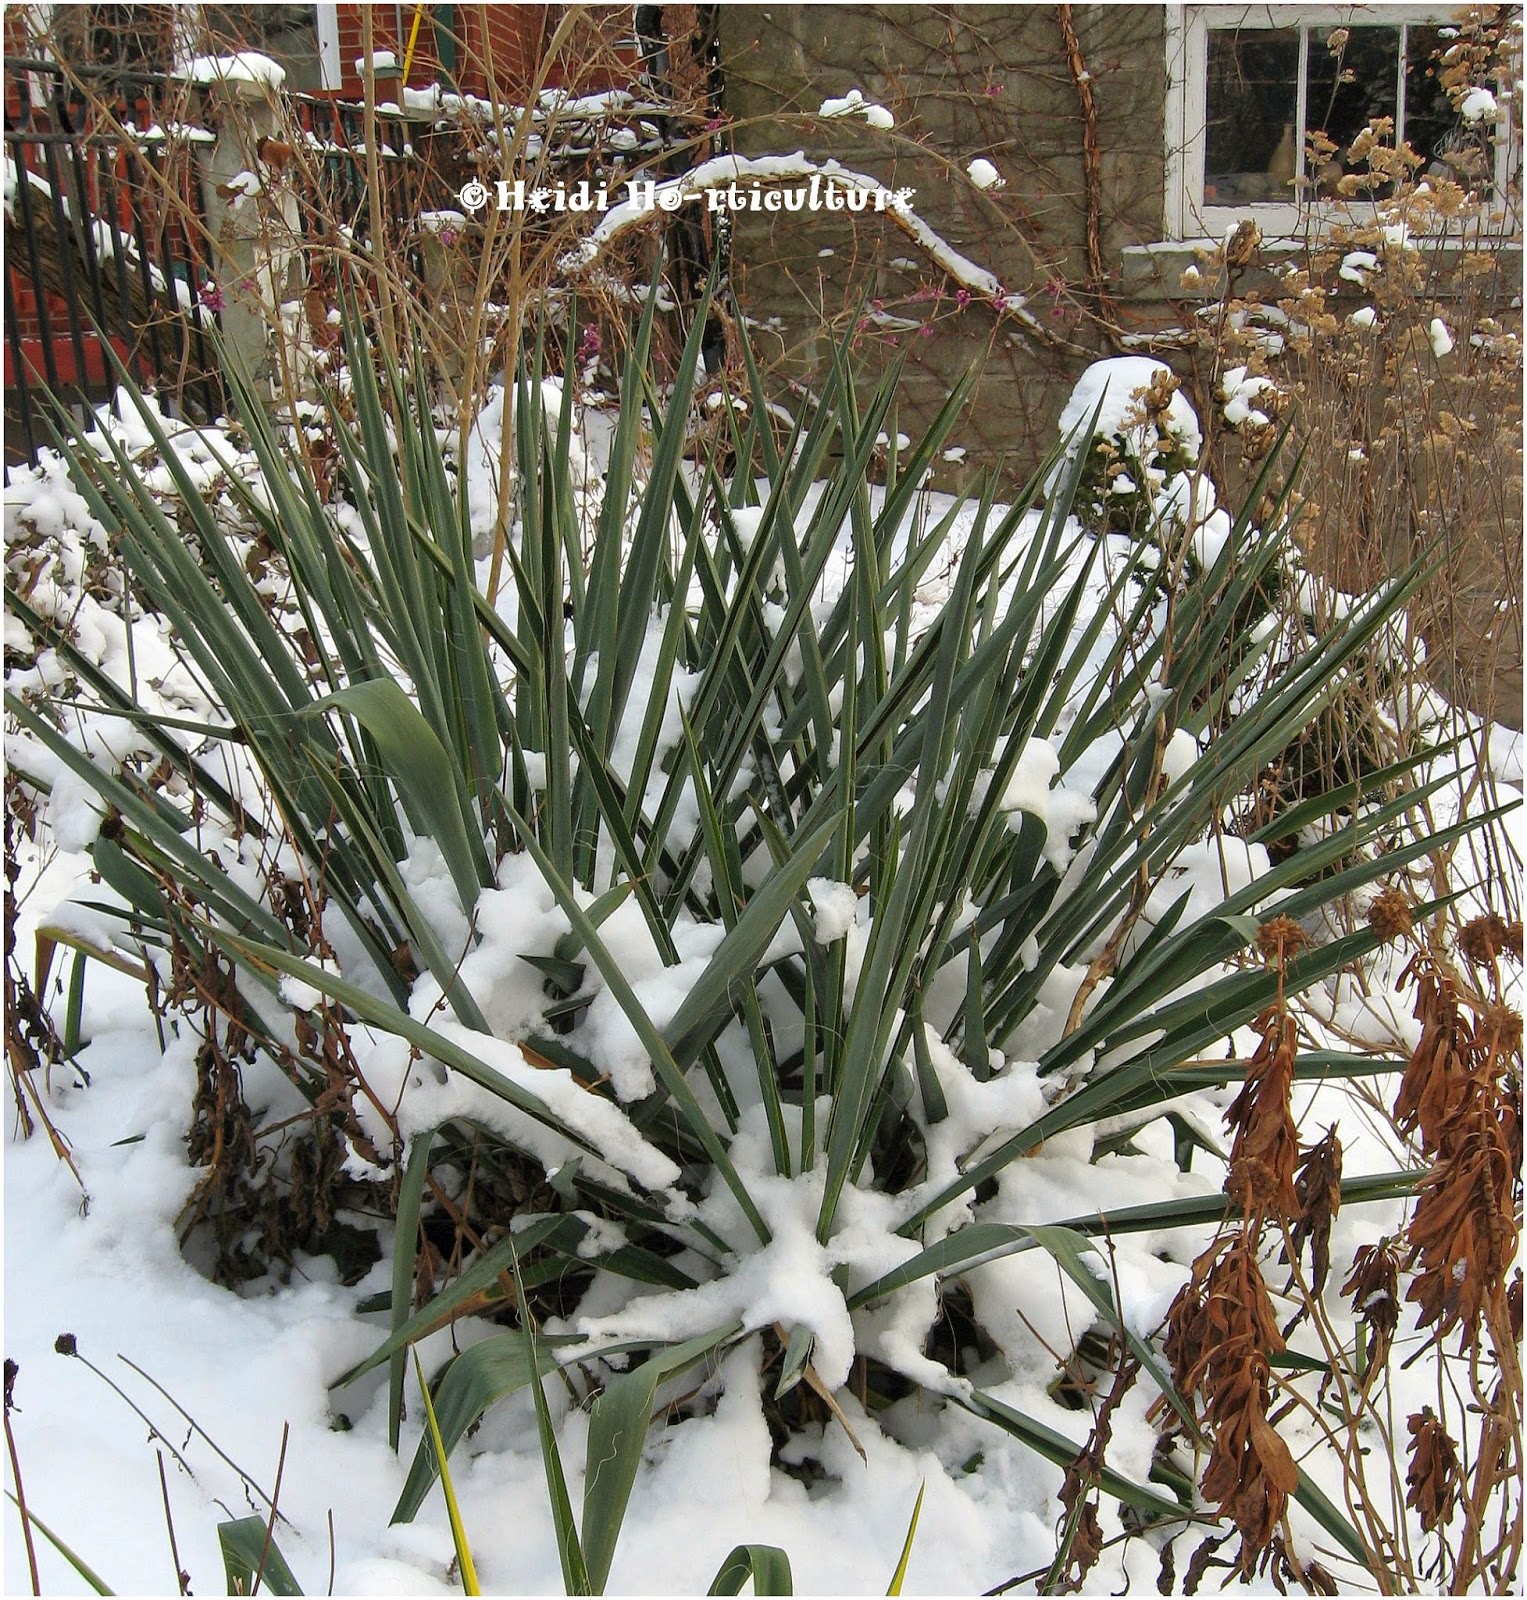
When healthy, even snow won't weigh down older yucca leaves.
Here's how to maintain them:

Yucca filamentosas expand and grow to become clumps. They flower generally after they reach 2 to 3 years in age.


A long spike of white flowers emerges from the centre of each plant in late June and blooms for about 3 weeks. Once the flower stalk begins to go to seed, the flowered plant begins to whither and die back. The trick is to peak beneath the foliage in order to find little plants emerging from the base.  Sometimes, if the 3 year old original plant starts to fade and wilt over, it smothers the young, new growth that will come from the root system. You must cut out the parent plant and allow the younger ones to breathe and emerge properly. Parent plants will not re-bloom.

Yuccas have deep root tubers. They can go down to 24" or more. Tough plant to dig out. Once the parent plant dies back with the old flower stock, the base of the plant begins to rot and can cause other smaller roots to rot with it. As the foliage starts to brown, the plant beneath loses vigor and it will fall on to itself. Making it rather untidy.

Like I did here, cut the whole parent plant out. Be sure it has the flower stalk like this one.

It is easiest to cut out with open pruners, using the blade like a knife and slice it out as close to the ground as possible. They are like potatoes, quite juicy.
Once all the flowered plants have been removed, you will see baby yuccas around the base of the original plants. 

You may think you've massacred the plant but lo'and behold...there on the left of the remaining stalk base, you'll see a little yucca waiting for light and air to allow it to start the whole process again.

Here's a closer view. The remaining tuber stalk will whither and die back whilst the young yucca will bulk up over the next growing year. This little plant won't flower for another 2-3 years, allowing you to enjoy it's evergreen foliage for a long while before it flowers.
In a clump of yuccas, there will be several plants at several growing stages. Once all the flowered plants have been removed, you will open up more room and allow the remaining plants that were suffocating from the flowered plants to spread out. These yuccas may look a bit little beaten up. Here is where the TLC comes in.

Lift up all the blades of yucca and remove any discoloured or brown leaves from the stem.

Pull down on the leaves - quite hard.

Like celery, they snap clear off the stem without causing damage. If you yank on them upward, you can yank the whole stem away from the root. Always pull downwards.

Old, dry, and damaged blades of foliage should be completely removed, not cut out. You'll need to do this in succession. Leaves wrap around the stem as it whorls up to the centre. Remove each this way, and they will come off with ease. Ripping them out of sequence will damage the stem or leave remnants of the leaf base still attached. These will whither and rot, causing some rot to occur at the root level. You want good air circulation to strengthen the stem.

Yuccas will force new growth from the centre, adding newer leaves during the growing season. Within a growing season, they will become deep green again. Much needed light and air then can help newer growth emerge and keep your yuccas looking vibrant and not limp or discoloured.

Winter maintenance:

Tough winters can cause this - half the foliage yellowing and the main core limp.
If you have many clusters of yucca, all healthy and the flowered plant removed, sometimes it's best to tie up the blades of foliage into a pony tail of sorts. This keeps the foliage off the ground and away from moisture and soil. Rip off one long leaf from the base of the plant. Use it as a binding. Gather the blades at the base and use the binding leaf to keep the plant together. This will keep the foliage upright and away from standing water or mushy soil. Come spring, remove the binding and allow the plant to fall into natural habit.

By removing older plants, newer plants will take over and you will be able to enjoy yuccas in your garden for a very LONG time, without them looking like they need to be yanked out.

Two months after my TLC, this is the same clump of yuccas flourishing again:


Related Posts Plugin for WordPress, Blogger...