Showing posts with label Hosta. Show all posts

Monday, June 30, 2014

Collecting Hosta Seeds: The Experiment

I have several hostas in my little garden. I love them. This one is 'June'.

Endless divisions have made my garden fuller and other folks happy. Yet, I have never attempted to germinate them from seed. Knowing their seed won't be like the parent plant, I still aim to try the attempt. I realize this may be a waste of time, yet - I'm itching to see if it works out. My garden is small enough to contain about 6 various hostas that flower at the same time. I want to see if cross-pollination has been successful. Late last summer, I witnessed wasps and bees go from one flower to another. Now let's see if I can grow some from seed.

Throughout September and October, I began to harvest the seed.

I waited to collect, until the seeds had matured on the stem.

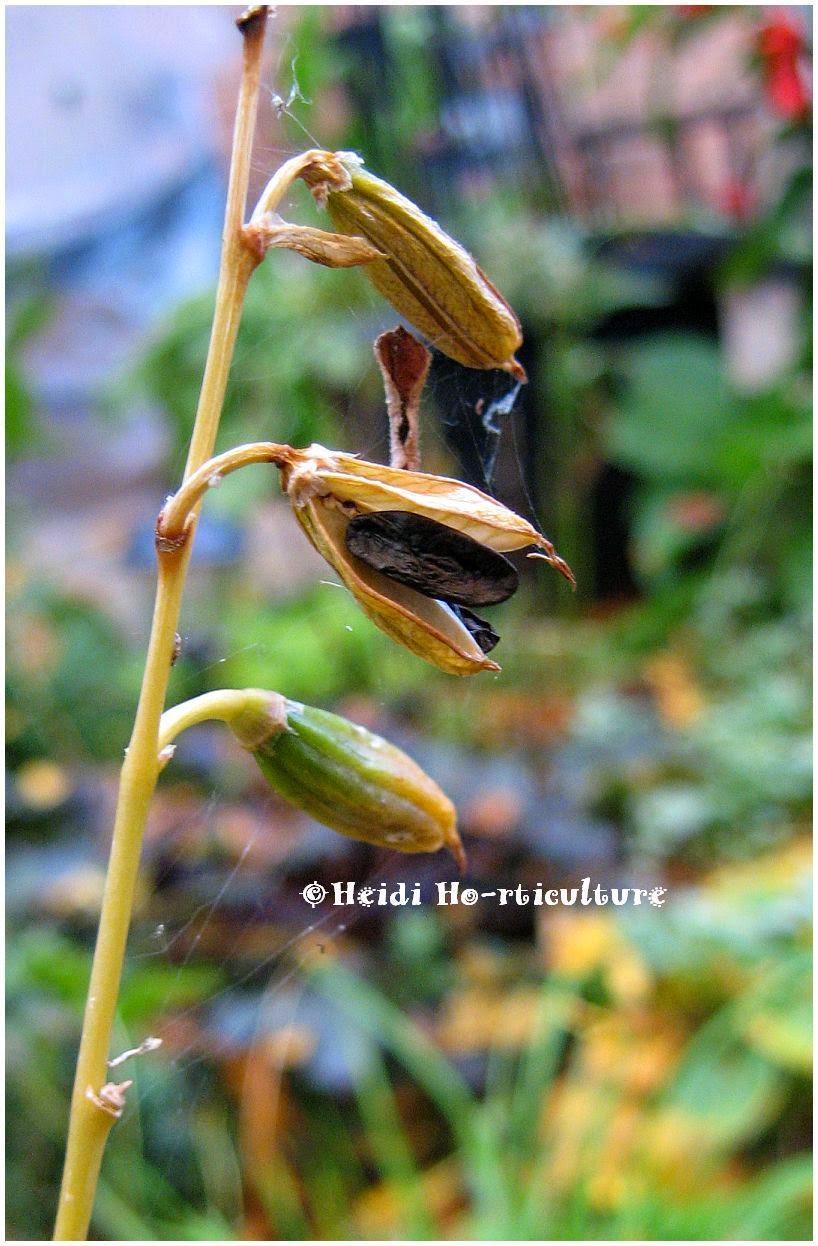
This Hosta plantagenia has rather long seed pods, full of seeds.

Be sure to harvest the seed when the pods are beginning to dry out and turn like straw - just before the pods begin to spring open. Lay them out on a piece of paper for a few days to completely dry. Then mark an envelope for each variety.

Several pods have duds - these pale white seeds that have no embroinic component. Discard. Like maple keys, they have a winged portion and a seed tucked in the tip.
They look sort of like tadpoles. The trick to germination, is stratification when it comes to hostas. I learned this the hard way. My first attempt had zero results. The second attempt after stratifying the seeds, worked. This means, they must be cooled in storage before sowing. I left them in their little envelopes, in a sealed dry container in my little potting shed - outside all winter. The stratification initiates the seed to germinate. The potting shed gets freezing temps which help the seed to become ready for germination. The key is to keep them dry. I just placed them in paper envelopes and in a tin box.
In May, I gathered some toilet loo-rolls for this:
Cutting toilet rolls in half, I filled them with potting mix. Compacting the soil tightly in the rolls. Once the rolls are watered they can swell and fall apart, so I use string to keep them grouped. Here I just used stuff around the house. I only had enough viable seeds to fill 16 half rolls. This old baking tray will do the trick.

I examined each seed. Making sure they had a wing and a solid seed side. Taking the seed I placed them on the surface of the potting mix.
I put about 3 seeds per roll.
With the blunt end of a skewer, I tucked them in just beneath the soil's surface.
I marked each roll with a dot, differentiating between the varieties of hosta seeds I collected.
I tied them together, so they don't collapse as easily.
To add greater humidity, I made a tiny greenhouse tent. Sticking skewers into the rolls, I have made posts for the cover.

Until germination, I just want to hold in moisture and humidity. You can buy seeding trays with domes for this purpose, I just decided to use household items for the job.

I placed it in a warm window sill, in late May until the threat of frost was over.  Bringing it outside to help the process.

Within 4 weeks, this is the result:
Small little hostas emerged.

I thinned out the germinated plants, leaving the stronger, healthier baby hostas - 1 per each roll.
Within 4 weeks, they are now starting to look like mini hostas. Once they begin to show a second or third leaf, I lightly fertilized them with a 7-7-7 water soluble. No streaking or colouring, yet. Plain green as I suspected. Who knows...it may still happen.
Once they fill out these rolls, I will transplant into larger pots and see what nature reveals. Will update later in the summer. It certainly is a fun process. But if you want to guarantee true cultivar characteristics, then divide from the parent plant you like.


Tuesday, May 15, 2012

Perennial planters

Sometimes buying annuals every spring for planters can be quite costly - especially when you have many containers as I do. I end up only using a few annuals this way and divide perennials that I have in my garden. Because divisions need to be done earlier rather than later, I began this process in late April. I placed divisions into the container, them gradually filling up to become quite full.  I find it gives my containers a bit of life before the threat of frost is gone.

It's amazing how in 3 weeks, this container has filled out already.

I used:
1 Astilbe
2 Hostas (1 taller, 1 shorter - contrast colours)
2 different Lamiums
1 Rudbeckia goldstrum

I plan to add 2 begonias for a splash of colour.  Easy enough, and cheaper on the pocket book.

For sunny containers I divide:

Salvia may knight (earlier flowering)
Sedum (late summer to fall flowering)
Lamiastrum (trialing - usually overwinters in my containers from year to year)
Rudbeckia (mid summer to Sept flowering)
Echinacea (mid summer)
Sedum Purple Dragon (trailing)

For shade loving spots:

Hostas
Japanese Painted Fern
Astilbe (late spring, early summer)
Lysmachia
Lamium

With perennials, I find regular potting soil isn't rich enough to help keep the plants growing and filling out the container. I use 1 part potting soil to 1 part compost (triple mix is perfect too).  This adds a denser medium that will encourage the perennials to beef up - and the potting soil added won't bake rock hard during the summer.

Going away for weekend getaways doesn't cause as much worry with these containers, as less watering is needed.  It gives longevity to my pots come fall too, with initial frosts not damaging the foliage much. I also love the textures, the leaf colour and the difference in look compared to what you see everywhere else.

Leaving a pocket here and there for annuals helps to finish it off, when a spot of bloom (colour) is needed.

In close proximity to seating areas, I have incorporated my foliage veggies.Great way to harvest and enjoy texture too.

If you are wondering how this planter overwinters, I will say it's a hit and miss. Lamium, hostas and Rudbekia have overwintered well in my pots. I place them in a sheltered spot, next to a brick wall for insulation - watering them til freeze up. In my front yard, I just tuck them into the garage to store once the frost has killed off any herbaceous growth.

I love doing this, as it solves my perennials getting too large for their "britches". I don't have much room to divide and add to my garden. This way, I am spreading the plants around in other ways. It's a great gift idea too, for new home owners (they can add them to their garden), or just a lovely idea instead of the common gift.
Related Posts Plugin for WordPress, Blogger...